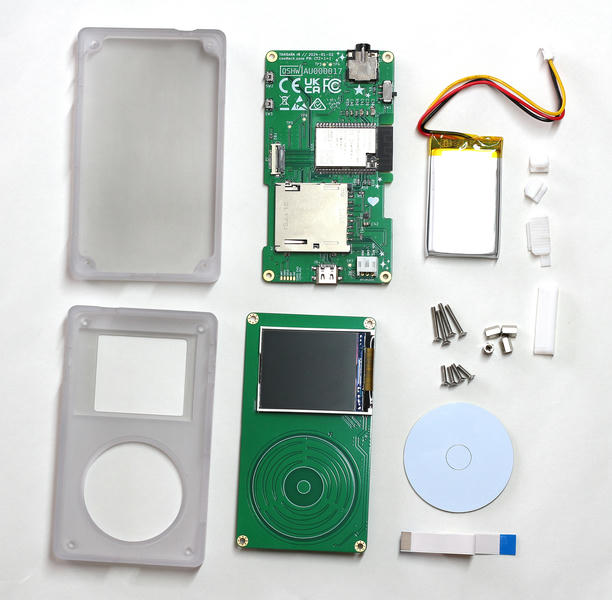
This page contains instructions for disassembling and resassembling a Tangara. In general, it is often convenient to only partially disassemble the device. For example, removing only the back in order to change the battery, or removing only the front in order to swap in a new faceplate. This cuts down on a lot of fiddliness and room for error. Even when totally replacing your device's case, it is often easiest to do the replacement one half at a time.
Before disassembly
Even if you only intend to partially disassemble your device, we recommend completely powering off the device first. Do this by stopping any music playback, putting the lock switch to the locked position, and then waiting about 30 seconds.
FIXME: We should have a button in settings that powers off explicitly.
Partial Disassembly (front)
Disassembling the front of the device is usually only needed when replacing the faceplate.
Start by unscrewing the four screws in the corners of the front of the case. Any order is fine, although when reassemblying it is generally easiest to do opposing corners first. e.g. top left, then bottom right, then the remaining two.
Once all four screws are removed, you should be able to simply lift the top half of the case off of the bottom half.
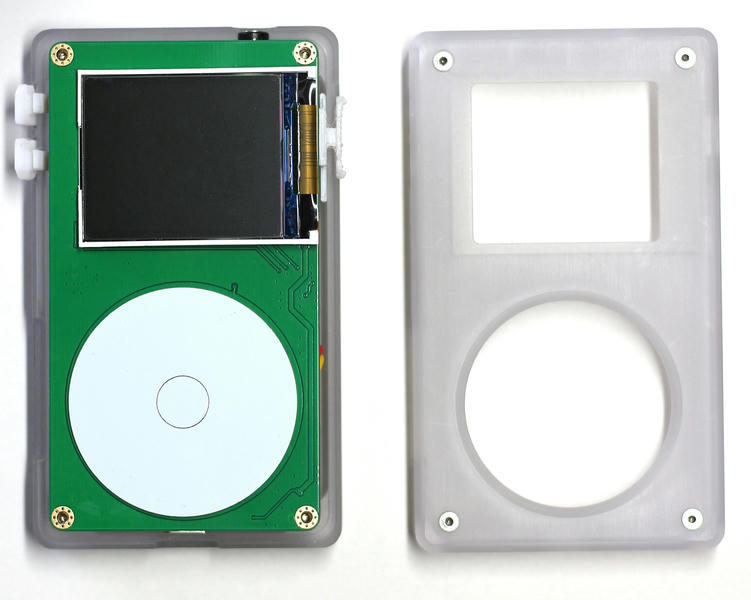
The buttons and touchwheel cover can fall out very easily at this stage, so it's usually best to just remove them now and put them to the side. Do not attempt to remove the switch cover from this side, as it is held in place by the mainboard PCB.
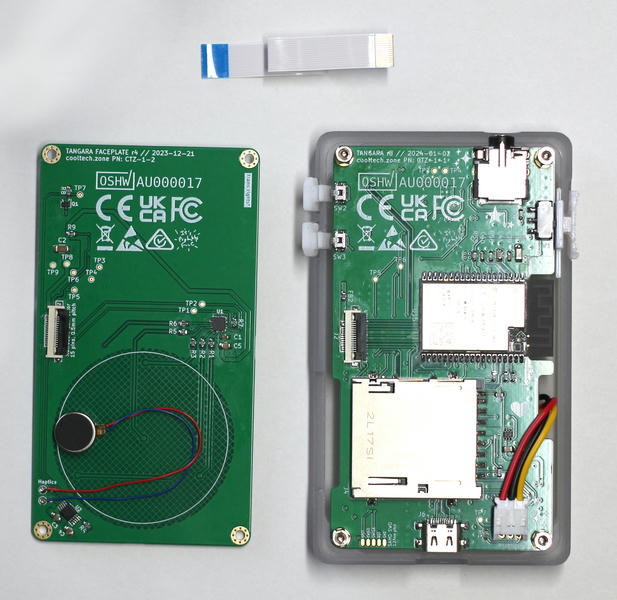
Next, you will need to disconnect the ribbon cable connecting the faceplate to the mainboard. Gently pull the faceplate up on the right side, doing your best to not strain the cable or connectors. Then, using a fingernail, flip up the latch securing the ribbon cable to the faceplate.
The faceplate will now come away from the rest of the device. To avoid accidentally straining the ribbon cable, you may want to remove it from the mainboard as well whilst the device is disassembled.
Reassembling the front of the device is slightly finicky, but the steps are broadly the same, just in reverse order.
Partial Disassembly (back)
Disassembling the back of the device is useful for replacing the battery, or for gaining access to the mainboard for making modifications.
Start by unscrewing the four screws in the corners of the case. Any order is fine, although when reassemblying it is generally easiest to do opposing corners first. e.g. top left, then bottom right, then the remaining two.
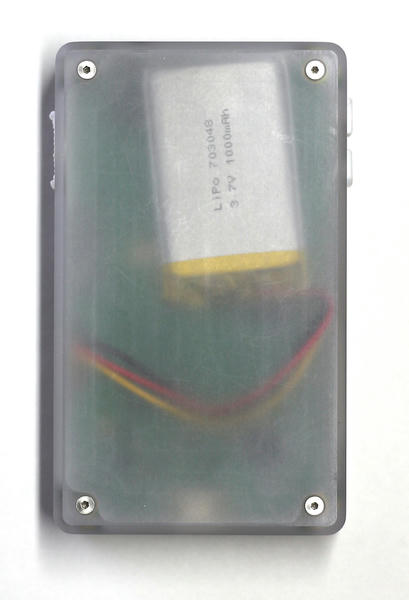
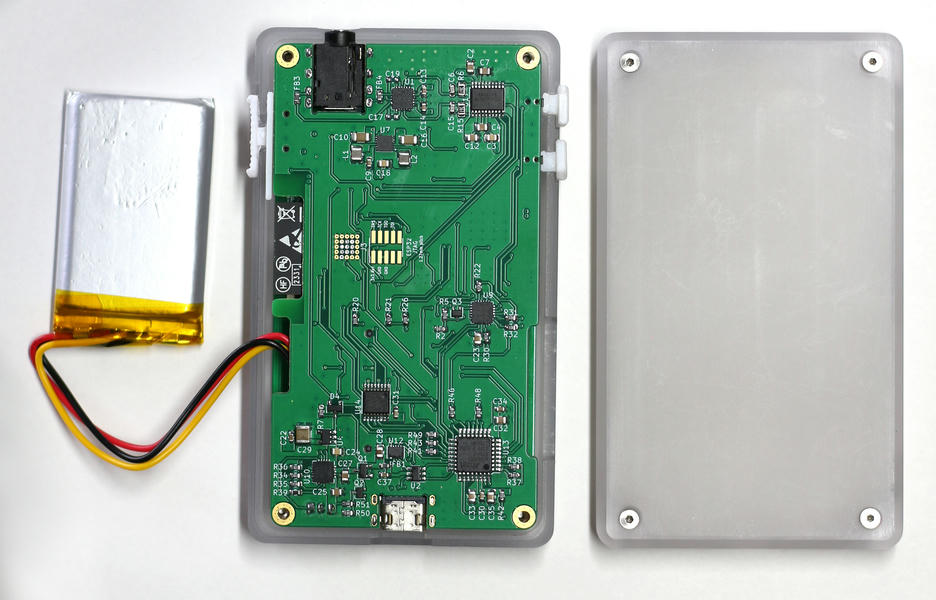
Once all four screws are removed, you should be able to simply lift the bottom half of the case off of the top half. This will reveal the battery, which has enough spare cable on it for you to place it to one side.
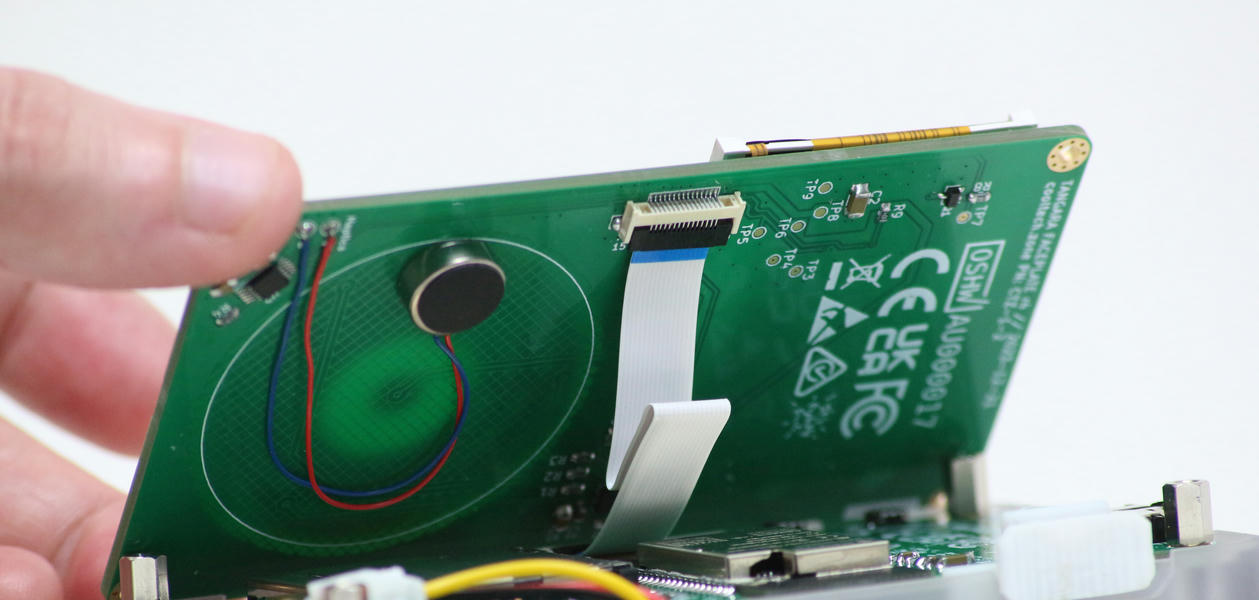
Next, you will need to disconnect the ribbon cable connecting the mainboard to the faceplate. Gently pull the mainboard up on the right side, doing your best to not strain the cable or connectors. Then, using a fingernail, flip up the latch securing the ribbon cable to the mainboard.
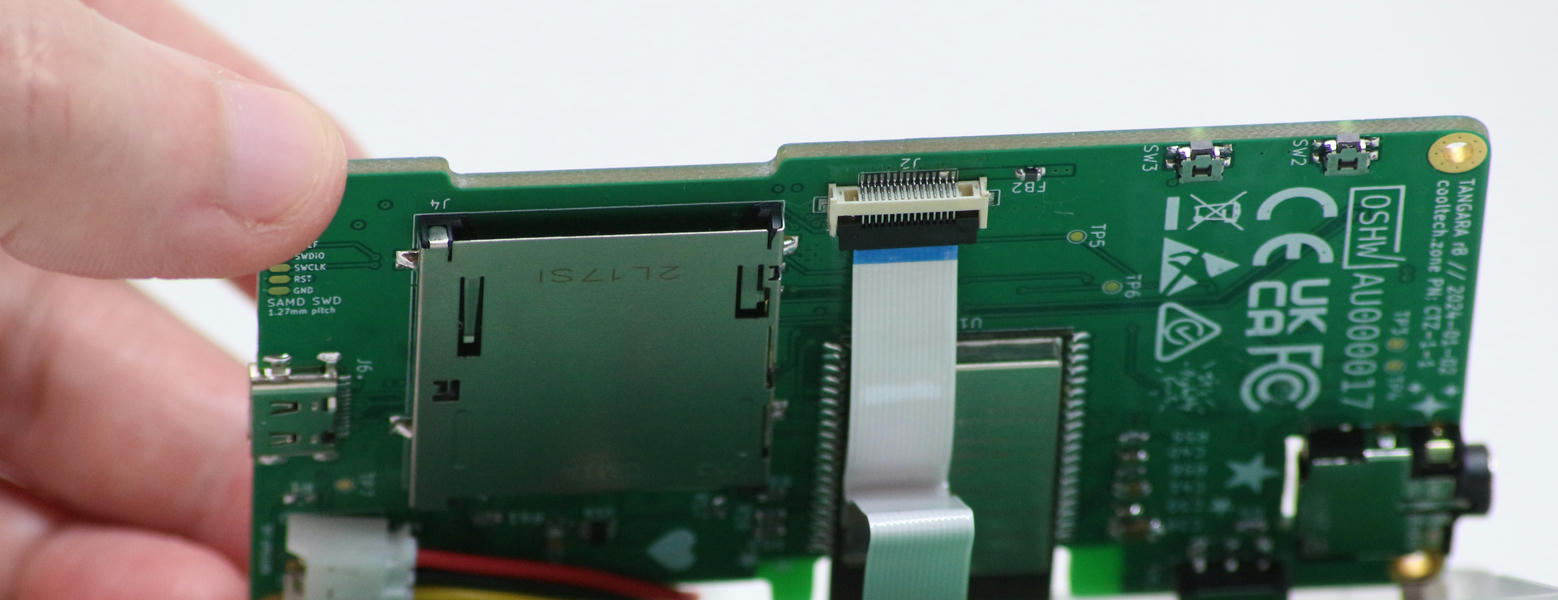
The mainboard will now come away from the rest of the device. To avoid accidentally straining the ribbon cable, you may want to remove it from the faceplate as well whilst the device is disassembled.
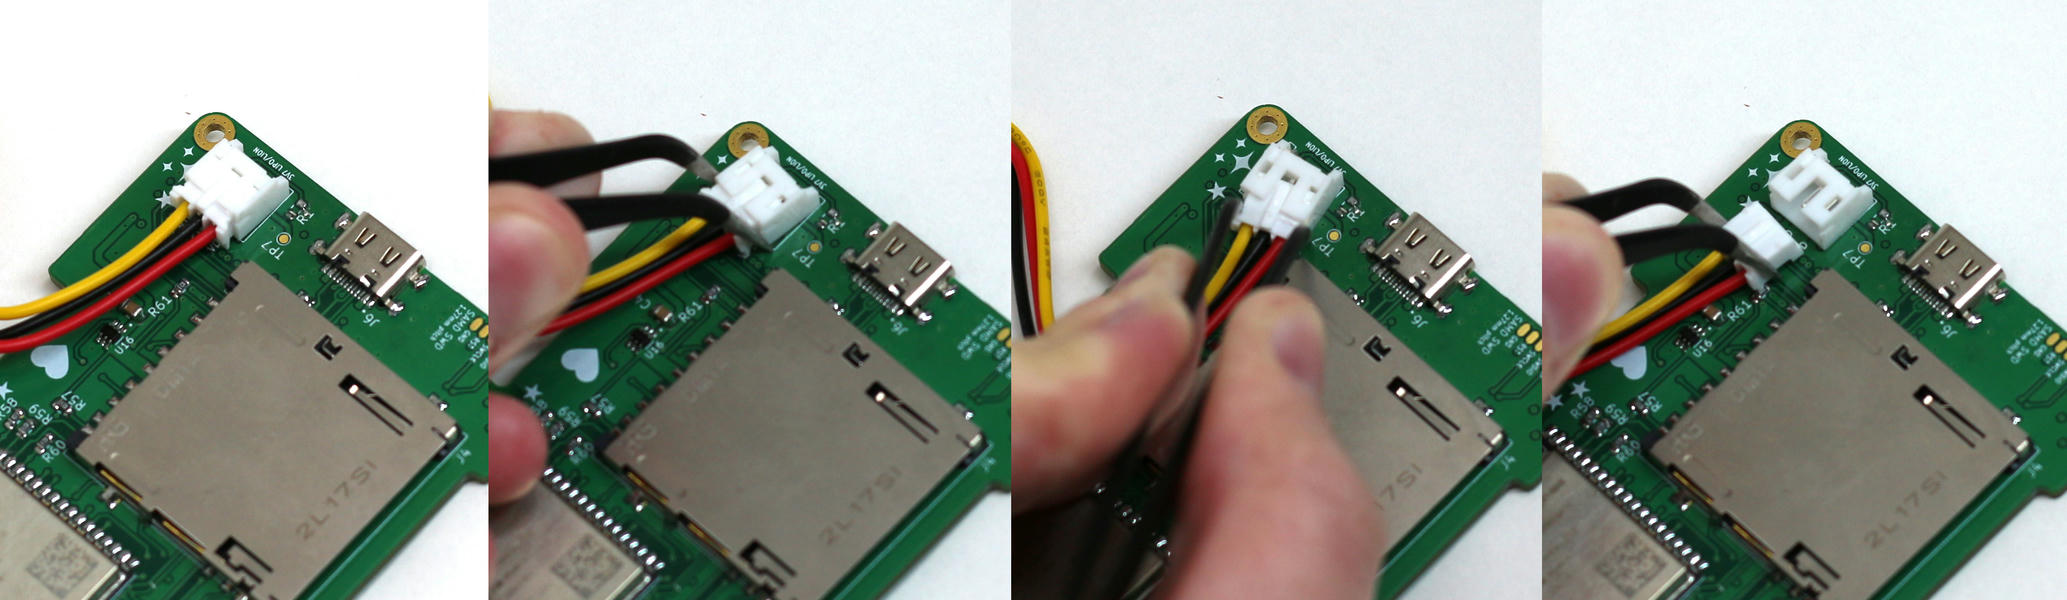
On the reverse side of the mainboard is the battery connector. When unplugging the battery, remember not to put too much pressure on the individiual wires. Instead, grip the sides of the connector and gently pull back and forth until the battery side comes free.
Reassembling the front of the device is slightly finicky, but the steps are broadly the same, just in reverse order; first plug in the battery (making sure the lock switch is set to 'off'), then the faceplate connector, then stack everything up and screw it together.
Full disassembly
A complete disassembly of your device is as simple as doing either partial disassembly, and then unscrewing the standoffs from the remaining half. Once you have done this, the remaining screws and PCB will easily come away.